
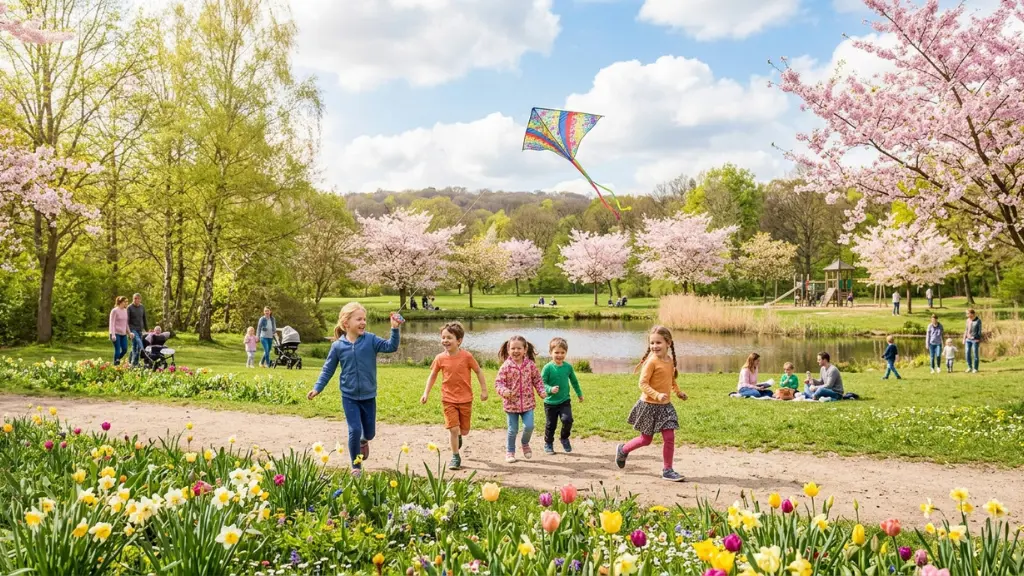
Spring activities for kids turn everyday afternoons into memorable adventures your family will look forward to.
Spring is one of the best seasons for hands-on learning and play. The weather is nice, nature is full of new things to discover, and kids naturally have extra energy to burn.
Whether you’re a parent planning a fun weekend, a teacher creating spring lessons, or a caregiver looking for ways to spend long afternoons, this guide has practical and easy-to-follow ideas for every age group — with complete step-by-step instructions for each so that you can get started right away without any extra planning.
Why Is Spring the Best Season for Kids to Be Active?
Mild weather lets kids stay outside longer without getting too hot or too cold. Budding leaves, emerging insects, and returning birds give them something new to notice almost every day, which naturally sparks curiosity and early science skills.
And after months cooped up indoors, kids usually show real enthusiasm for physical play — a boost that supports gross motor development and mood.
Spring also lands at a convenient point in the school calendar. Teachers can weave outdoor observations into science lessons, while parents get a stretch of mild weekends before summer heat makes long outdoor stretches harder.
For both parents and teachers, that makes spring the perfect window to blend fun with learning — when an activity feels like play, kids rarely notice they’re building skills.
1. Puddle Jumping and Rain Walks
April showers are made for this. Grab rain boots and a raincoat, then head out after a light rain to jump in puddles or take a “rain walk” to notice how the neighborhood looks and sounds different when it’s wet.
What you’ll need:
- Waterproof rain boots and a raincoat or splash suit
- A change of dry clothes is waiting at home
- A towel by the door for muddy boots
How to do it:
- Wait until the rain has slowed to a drizzle or stopped, so visibility and safety are better.
- Pick a safe, low-traffic route — a backyard, quiet street, or park path works well.
- Let kids lead the way and choose which puddles to jump in; measuring puddle depth with a stick adds a light science angle.
- Pause along the way to notice sounds (dripping gutters, birds after rain) and smells (wet earth, fresh grass).
- Head home for warm socks and a hot drink afterward — it makes the whole outing feel like an event rather than a chore.
Why it works: Puddle jumping is essentially free gross-motor exercise, and rain walks introduce toddlers and preschoolers to basic weather vocabulary (drizzle, downpour, puddle, splash) in a completely natural way.
2. Spring Scavenger Hunt
A spring scavenger hunt is one of the easiest spring-themed activities to set up, and it costs nothing. Print or hand-draw a simple checklist and send kids off to find each item in the yard, a local park, or even around the block.
What you’ll need:
- A printed or hand-drawn checklist (picture-based for younger kids, word-based for readers)
- A pencil or crayon to check off items
- A small bag or basket for anything collected along the way
Sample checklist items:
- A ladybug or other small insect
- A dandelion or other yellow flower
- A bird’s nest or a feather
- Three different leaf shapes
- Something soft (moss, grass) and something rough (bark)
- A puddle or sign of recent rain
- A butterfly or a bee
- A pinecone or acorn left over from fall
How to run it:
- Hand out the checklist and explain the boundaries of the search area.
- Set a loose time limit (15–20 minutes works well for most attention spans).
- For toddlers, walk alongside and point things out together rather than expecting them to search independently.
- For elementary kids, turn it into teams or a race against a timer to raise the challenge and add a competitive element.
- When the hunt ends, sit down together and talk through what was found — this reinforces vocabulary and observation skills.
Age adjustments: Keep the list to 3–4 picture-based items for toddlers. For elementary kids, add trickier finds, such as a specific bird species or a winged insect, and consider awarding a small prize for completing the full list.
3. Read Spring Books for Kids
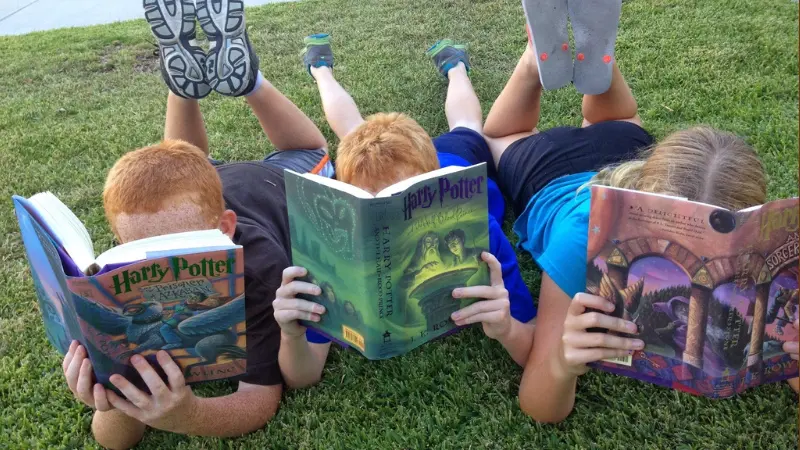
Pairing reading with the season is one of the simplest ways to reinforce vocabulary and comprehension. Pull together a stack of spring-themed picture books and set up a cozy reading nook.
What you’ll need:
- A selection of spring-themed picture books (library or home collection, both work)
- A cozy corner with cushions, a blanket, or a reading tent
- Optional: a related craft or activity to follow up with
How to run a strong storytime:
- Choose books about flowers, rain, gardening, or baby animals to match the season’s themes.
- Set up a comfortable, distraction-free reading spot.
- Pause periodically to ask predicting questions — “What do you think will happen to the seed next?” — to build comprehension skills.
- Point out new vocabulary as it comes up (bloom, sprout, hatch, migrate) and explain it in simple terms.
- Follow up the story with a related activity: a book about gardens pairs naturally with planting seeds, and a book about rain pairs well with the rain cloud-in-a-jar demo described earlier.
- For toddlers, choose board books with textures or lift-the-flap features to keep hands as engaged as ears.
Why it works: Reading spring books for kids doesn’t need to be a separate event — it fits well as a wind-down activity after a busy outdoor day, and pairing stories with hands-on follow-ups helps new vocabulary and concepts stick.
4. Fly Kites in the Spring Breeze
Spring’s steady winds make it the ideal season to fly kites. Store-bought kites work fine for a quick outing, but building a simple paper or plastic-bag kite together adds a craft element to the outdoor fun before you even get outside.
What you’ll need:
- A kite (store-bought, or homemade from a plastic bag, two sticks, string, and tape)
- An open field, beach, or large park with no overhead power lines or trees
- A day with light, steady wind (5–15 mph is ideal)
How to build a simple homemade kite:
- Lay two thin wooden dowels or sticks in a cross shape and tie them together at the center.
- Cut a large plastic bag or lightweight fabric into a diamond shape slightly larger than the frame.
- Attach the plastic to the frame with tape, folding the edges over the sticks to secure it.
- Tie a length of string to the center point where the sticks cross.
- Add a tail from ribbon or fabric strips for stability in the wind.
How to fly it:
- Stand with your back to the wind and let out a small length of string.
- Have a helper hold the kite up while you walk backward, letting the wind catch it.
- Once it lifts, slowly let out more string as it climbs.
- Let younger kids practice running with the kite on the ground first before attempting a full launch.
- Bring extra string and a small repair kit (tape works in a pinch) for older kites that might tear.
Why it works: Kite flying doubles as an easy, hands-on lesson in wind and air resistance for elementary-age kids, and building one first adds a satisfying craft-to-play pipeline.
5. Sidewalk Chalk Games
Hopscotch, obstacle courses, or a chalk maze turn a driveway into an afternoon of activity. It’s low-cost, low-prep, and endlessly customizable.
What you’ll need:
- A box of sidewalk chalk
- A driveway, sidewalk, or patio
Game ideas:
- Hopscotch: Draw the classic numbered grid, then take turns tossing a small stone and hopping through the squares.
- Chalk maze: Draw a winding path with dead ends for younger kids to trace with their finger or walk through.
- Target toss: Draw a bullseye with point values in each ring and toss beanbags or small stones to score.
- Chalk obstacle course: Combine hopping squares, balance lines, and spin circles into one continuous path.
- Color-matching hunt: Draw colored shapes around the yard and have toddlers find matching colored objects to place on top.
Why it works: Chalk games require almost no setup time and can be adjusted instantly for different ages, making them a reliable go-to on days when energy is high, but plans are loose.
6. Go on a Nature Walk and Collect Spring Flowers
Instead of a plain walk, give kids a mission: collect a small bouquet of spring flowers, count how many different colors they can spot, or listen for different bird calls along the way. This turns a simple outing into a mini science lesson.
What you’ll need:
- A small basket, bag, or bucket to hold collected flowers and leaves
- A magnifying glass for a closer look at petals and insects
- A notebook for older kids to sketch or jot down what they find
- Comfortable walking shoes
How to do it:
- Choose a route with varied plant life — a park, nature trail, botanical garden, or even a neighborhood with lots of gardens works well.
- Before setting out, explain what’s okay to pick (common wildflowers like dandelions and clover) versus what should be left alone (flowers in someone’s private garden or protected park areas).
- Walk slowly and let kids set the pace — the goal is observation, not covering distance.
- Encourage them to smell flowers, touch different leaf textures, and listen for bird calls along the way.
- Use the magnifying glass to look closely at petal patterns, insect visitors on flowers, or leaf veins.
- Bring everything collected home in the basket.
What to do with the flowers afterward: The flowers collected on this walk can be reused later for pressing, a nature collage, flower printing, or arranged in a small vase on the kitchen table — so this single activity naturally feeds into several others on this list.
7. Have a Spring Picnic
Once the ground has dried out a bit, a picnic is a low-effort way to turn an ordinary meal into an event. Pack a blanket and some simple finger foods, then head to a backyard, park, or garden.
What you’ll need:
- A picnic blanket or an old sheet.
- A basket or cooler bag.
- Easy finger foods: sandwiches, cut fruit, crackers, cheese cubes.
- Napkins, water bottles, and a trash bag for cleanup.
How to plan it:
- Pick a spot with some shade and, if possible, a view of flowers, trees, or a pond.
- Let kids help pack their own small picnic basket the night before or morning of — this builds independence and gets them excited early.
- Pair the picnic with another activity beforehand, such as a short nature walk or scavenger hunt, so the picnic serves as the “reward” at the end.
- Bring bubbles, a frisbee, or sidewalk chalk to use after eating, so the outing doesn’t end as soon as the food is gone.
- Do a quick check of the site for ants or wasp nests before laying out the blanket.
Why it works: Picnics are an easy way to combine several spring activities into one outing without over-scheduling the day, and eating outdoors alone tends to make food more appealing to picky eaters.
8. Bike Rides and Scooter Trails
Warmer weather is the perfect excuse to dust off bikes and scooters. Local parks and greenways often have kid-friendly paths, making this an easy weekend outing.
What you’ll need:
- A properly fitted bike, scooter, or balance bike.
- A helmet (and knee/elbow pads for beginners).
- Water bottles for breaks.
How to plan a good ride:
- Check tire pressure and brakes before heading out, especially if the bike has been stored all winter.
- Choose a flat, low-traffic path for younger or less confident riders; save hills and busier trails for more experienced kids.
- Plan a turnaround point or a fun destination — a playground, ice cream stop, or lake view — to give the ride a purpose.
- Take breaks every 15–20 minutes for younger riders to avoid burnout.
- Practice hand signals and basic road safety rules if the route includes any street crossings.
Why it works: Biking builds balance, coordination, and stamina, and it’s one of the few spring activities that doubles as genuine cardiovascular exercise while still feeling like pure fun.
9. Create a Spring Sensory Bin
A spring sensory bin is one of the simplest ways to keep toddlers engaged for long stretches of independent play. Fill a shallow plastic bin with a spring-themed base and let them dig, pour, and sort.
What you’ll need:
- A large, shallow plastic storage bin.
- A filler base (see options below).
- Small scoops, cups, tongs, and funnels.
- Add-in objects for extra sensory variety.
Filler and add-in ideas:
- Silk or real flower petals and small pieces of artificial grass.
- Plastic bugs, butterflies, or bird figurines.
- Dry beans, rice, or birdseed as a filler base.
- Smooth stones or wooden discs for sorting by size and color.
- Small watering cans or spray bottles for a “gardening” theme.
How to set it up:
- Line the bin with the chosen filler base, filling it about two-thirds full.
- Mix in the themed add-ins so they’re partially hidden and waiting to be discovered.
- Place scoops, cups, and tongs nearby for pouring and transferring play.
- Sit nearby to supervise, especially with toddlers who still mouth objects.
- Rotate the theme every week or two (adding new colors, textures, or figurines) to keep interest fresh without buying anything new.
Safety note: Keep an eye on very young toddlers, as small items can pose a choking hazard — swap in larger pieces, like big pom-poms or wooden blocks, if needed.
10. Rain Cloud in a Jar
Fill a clear jar with water, top it with shaving cream “clouds,” and drop blue food coloring on top to watch it “rain.” It’s a simple science demo that captivates toddlers.
What you’ll need:
- A clear glass jar or cup
- Water
- Shaving cream
- Blue food coloring
- A pipette or dropper (optional, but helpful for controlled drops)
How to do it:
- Fill the jar about three-quarters full with water.
- Spray a generous layer of shaving cream on top to represent a cloud.
- Let the child slowly drop blue food coloring onto the shaving cream, one drop at a time.
- Watch together as the color seeps through the “cloud” and streams down into the water like rain.
- Talk through what’s happening in simple terms: “The cloud gets so full of water it can’t hold it anymore, so it rains.”
Why it works: This is a hands-on introduction to the water cycle that toddlers and preschoolers can see in action rather than just hear about, making the concept much easier to grasp.
11. Muddy Nature Play
Set boundaries (an old sheet or a designated corner of the yard) and let toddlers dig in dirt or mud with kid-safe tools. Messy play like this supports sensory development.
What you’ll need:
- A designated muddy area or a large plastic tub filled with dirt and water
- Kid-safe shovels, rakes, and buckets
- Old clothes that can get dirty
- A hose or outdoor faucet for cleanup
How to do it:
- Choose or create a contained mud area — a corner of the garden, a sandpit with added water, or a large tub.
- Dress the child in clothes you don’t mind getting stained, or a full-coverage smock.
- Provide simple tools: shovels for digging, buckets for hauling, and cups for pouring water.
- Let the play be unstructured — the goal is tactile exploration, not building anything specific.
- Have a towel and a hose or bucket of clean water ready nearby for a quick rinse-off before heading inside.
Why it works: Mud play is one of the richest sensory experiences available to toddlers, engaging touch, sight, and even smell, and research on outdoor and messy play consistently links it to better sensory processing and stress regulation in young children.
12. Bubble Time
Bubbles never go out of style. Chasing and popping bubbles outside builds gross motor coordination and is an easy way to burn toddler energy.
What you’ll need:
- Bubble solution (store-bought or homemade with dish soap, water, and a little sugar)
- A bubble wand, or a large bubble wand for bigger bubbles
How to do it:
- Head to an open outdoor space where there’s room to run.
- Blow a steady stream of bubbles and let the toddler chase and pop them.
- For older toddlers, let them try blowing their own bubbles — it’s a good fine motor and breath-control exercise.
- Try a giant bubble wand (made from string and two sticks) for a more dramatic version that older siblings will enjoy too.
Why it works: Chasing bubbles combines visual tracking, running, and hand-eye coordination in a way that feels like pure play, making it ideal for toddlers who are still building basic gross motor skills.
13. Simple Flower Crafts
Handprint flowers or tissue-paper blossoms glued onto paper stems are toddler-friendly crafts that double as keepsakes for grandparents.
What you’ll need:
- Washable paint (for handprints) or colored tissue paper
- Construction paper
- Glue stick or washable glue
- Green pipe cleaners or paper strips for stems
How to make handprint flowers:
- Paint the toddler’s palm and fingers with washable paint.
- Press the hand firmly onto paper, fingers spread like petals.
- Once dry, add a pipe-cleaner or paper stem below the print.
- Add a green paper leaf and write the date on the back — these make great keepsakes over multiple years to compare hand size.
How to make tissue-paper blossoms:
- Cut or tear colored tissue paper into small squares.
- Have the toddler scrunch each square into a small ball.
- Glue the balls onto a paper circle to form a flower head.
- Attach a stem-and-leaf plot below it.
Why it works: Both versions are forgiving of imperfect toddler motor skills while still producing a recognizable, giftable result — which builds confidence and pride in their own creation.
14. Spring Craft for Kids: Flower Prints
Flower printing is a favorite spring craft for kids because it turns real flowers into lasting art. There are two easy ways to do it.
What you’ll need:
- Fresh flowers, or vegetables like celery or bell peppers, cut to reveal a flower-like cross-section
- Washable paint in a shallow tray
- Plain paper or cardstock
- Wax paper or parchment paper (for the hammering method)
- A small hammer or mallet (for the hammering method)
Stamping method:
- Dip the flower head — or the cut end of a celery stalk or bell pepper — into washable paint.
- Press it firmly onto paper to leave a printed shape.
- Repeat with different flowers and colors to build a pattern across the page.
- Let dry fully before handling.
Hammering method (better for older kids, with adult supervision):
- Place a fresh flower face down on a piece of paper.
- Cover it with a sheet of wax paper.
- Gently hammer over the flower, working from the center outward, until the color and shape transfer through to the paper below.
- Carefully peel back the wax paper and remove the flattened flower to reveal the print.
What to do with the finished prints: Both versions work well as homemade cards, gift wrap, or framed keepsakes, and they give kids a direct, tactile connection to the flowers collected on the nature walk described earlier.
15. Egg Carton Flowers:
Cut and paint egg carton cups into flower shapes, then attach pipe-cleaner stems. This is a great budget-friendly upcycling project.
What you’ll need:
- A cardboard egg carton
- Scissors
- Washable paint and a paintbrush
- Green pipe cleaners
- Glue
How to make it:
- Cut individual cups out of the egg carton.
- Trim the top edge of each cup into rounded petal shapes using scissors (adult help recommended for younger kids).
- Paint each cup in bright colors and let it dry.
- Poke a small hole in the bottom of each cup and thread a green pipe cleaner through it, securing it with a knot or a dab of glue.
- Arrange several finished flowers in a small vase or attach them to a paper garden scene.
Why it works: This project reuses household recyclables, costs almost nothing, and gives kids practice with cutting, painting, and simple assembly — all useful fine-motor building blocks.
16. Birdhouse Building
A simple wooden birdhouse kit (or a milk carton version) gives kids a hands-on building project and a reason to watch for backyard birds afterward.
What you’ll need:
- A pre-cut wooden birdhouse kit, or a clean, empty milk carton
- Paint and paintbrushes
- Glue or a small hammer and nails (for wooden kits)
- A piece of string or wire for hanging
How to make a milk carton version:
- Rinse and dry an empty milk carton thoroughly.
- Cut a small round or arched opening on one side, big enough for a small bird to enter.
- Poke a few small drainage holes in the bottom.
- Let kids paint the outside in bright colors or nature-themed designs.
- Punch a hole near the top and thread a string through for hanging.
- Hang it from a tree branch or porch, ideally away from heavy foot traffic.
How to assemble a wooden kit: Most pre-cut kits come with simple instructions — kids can typically manage the painting and light assembly. At the same time, an adult handles any nailing or gluing of structural pieces.
Why it works: Beyond the craft itself, a finished birdhouse gives kids an ongoing reason to watch the yard for visiting birds, which naturally extends into informal science observation over the following weeks.
17. Rainbow Suncatchers
Using contact paper and torn tissue paper, kids can create colorful suncatchers to hang in a window — a favorite among elementary-age crafters.
What you’ll need:
- Clear contact paper
- Colored tissue paper, torn into small pieces
- Scissors
- String or ribbon for hanging
How to make it:
- Cut two matching shapes from contact paper (a circle, flower, or butterfly works well).
- Peel the backing off one piece and lay it sticky-side up.
- Let kids arrange torn pieces of tissue paper across the sticky surface in any pattern or color scheme.
- Peel the backing off the second piece of contact paper and press it on top to seal the tissue paper in.
- Trim the edges into a clean shape and punch a small hole at the top for hanging.
- Hang it in a sunny window to let the light shine through the colors.
Why it works: This craft produces an immediately visible, colorful result, and the sticky contact paper makes it manageable even for kids who struggle with glue-based projects.
18. Make a Spring Collage
A spring collage is a natural follow-up to a nature walk. Collect leaves, twigs, petals, and even small feathers, then arrange and glue them onto paper or cardstock.
What you’ll need:
- Collected natural materials (leaves, petals, twigs, feathers)
- Cardstock or heavy paper
- Glue
- Optional: crayons, cut paper, or paint for mixed-media additions
Project variations:
- Free-form collage: Let kids arrange found items however they like, with no set theme.
- Shape collage: Outline a butterfly, flower, or tree on the paper and fill the outline in with collected pieces.
- Mixed-media collage: Combine natural materials with cut paper, crayon drawings, or paint splashes for extra color and texture.
How to do it:
- Lay out all collected materials on a tray so they’re easy to see and reach.
- Let the child plan an arrangement before gluing, moving pieces around freely.
- Apply glue to the paper in small sections and press materials down firmly.
- Let it dry flat for a few hours before displaying or hanging.
Why it works: This activity connects outdoor exploration directly with creative expression, and it’s flexible enough to work for both toddlers (with adult help gluing) and older elementary kids working independently on more detailed designs.
19. Life Cycle Lessons
Caterpillar-to-butterfly or seed-to-plant life cycle activities are classic spring science units. Hands-on kits with real caterpillars or bean seeds make the lesson memorable.
What you’ll need:
- A live butterfly-growing kit, or bean seeds and clear cups
- A daily observation journal for each student
- A classroom chart to track stages as a group
How to run it:
- Set up the kit (caterpillars or seeds) somewhere visible in the classroom.
- Assign a few minutes each day for students to observe and record changes in a simple journal — a drawing plus one sentence works well for younger grades.
- Introduce the vocabulary for each stage as it happens (egg, larva, pupa, adult; or seed, sprout, seedling, mature plant).
- When the cycle completes (a butterfly emerges, or the plant is fully grown), hold a short class discussion or a small “release day” celebration.
Why it works: Watching a real-life cycle unfold over days or weeks makes abstract scientific vocabulary concrete, and the daily journaling habit builds observation and writing skills simultaneously.
20. Weather Graphing
Have students track daily weather (sunny, rainy, cloudy) on a classroom chart for a month. It’s a simple, ongoing way to blend science and early math.
What you’ll need:
- A large wall chart or whiteboard grid
- Weather symbol stickers or magnets (sun, cloud, rain, wind)
- A designated “weather helper” role that rotates among students
How to run it:
- Each morning, assign a student to check the weather outside (or a forecast) and place the matching symbol on that day’s spot on the chart.
- At the end of each week, count up how many sunny, rainy, or cloudy days occurred and record the totals.
- At the end of the month, turn the totals into a simple bar graph as a class.
- Discuss patterns: Was this month wetter or drier than expected? Did certain days of the week tend to be sunnier?
Why it works: This activity turns a daily two-minute routine into a running math and data project, giving students a concrete, real-world dataset they helped build themselves.
21. Spring Writing Prompts
Prompts like “If I were a raindrop, I would…” or “My favorite thing about spring is…” give young writers a seasonal hook for creative writing practice.
Sample prompts by age level:
- Younger grades: “Draw and write about your favorite spring flower.” / “What sound does spring rain make?”
- Middle grades: “If I were a raindrop, I would…” / “Write a story about a seed’s journey to becoming a flower.”
- Older elementary: “Compare winter and spring — what changes have you noticed?” / “Write a persuasive paragraph about why spring is the best season.”
How to run it:
- Introduce the prompt and give students a few minutes to brainstorm ideas out loud as a class before writing individually.
- Allow 15–20 minutes of independent writing time.
- Invite volunteers to share their work aloud, or display finished pieces on a classroom “Spring Writers” board.
Why it works: Seasonal prompts give students something concrete and familiar to write about, which tends to lower the barrier for reluctant writers compared to open-ended topics.
22. Class Garden Project
A raised bed, window box, or even a few pots on a windowsill lets a whole class participate in planting and observing growth together.
What you’ll need:
- A raised garden bed, a window box, or several large pots
- Potting soil
- Easy-to-grow seeds (beans, radishes, sunflowers, herbs)
- Small hand tools and watering cans
- A rotating watering schedule chart
How to run it:
- As a class, choose what to plant based on what grows quickly and is safe to handle (beans and radishes sprout within a week or two, which keeps younger students engaged).
- Assign small groups to specific rows or pots so everyone has ownership over a section.
- Create a watering rotation so different students are responsible on different days.
- Track growth on a shared class chart using weekly measurements or photos.
- If the garden produces anything edible, plan a simple class tasting or harvest day at the end.
Why it works: A shared class garden builds responsibility and teamwork alongside plant science, and the visible, week-over-week progress keeps students checking in and staying invested.
23. Earth Day Projects
Since Earth Day falls in spring, recycling crafts, litter cleanups, or “reduce, reuse, recycle” lessons fit naturally into a spring unit.
Project ideas:
- Recycled material sculptures: Have students build a small sculpture or model using only clean recyclables (bottle caps, cardboard, paper tubes).
- Campus or park litter cleanup: Organize a short, supervised walk around the school grounds or a nearby park with gloves and trash bags to collect litter.
- Reduce-reuse-recycle sorting game: Set up three labeled bins and have students sort sample items (a juice box, a banana peel, a plastic bottle) into the correct category.
- Seed paper cards: Make simple cards embedded with seeds from recycled paper pulp that can later be planted.
How to run it:
- Choose one or two projects that fit your available time and materials.
- Tie the activity back to a short discussion on why reducing waste matters, using age-appropriate language.
- If doing a cleanup, review safety rules beforehand (gloves on at all times, no picking up sharp or unknown items).
Why it works: Earth Day projects connect the spring science theme to real-world environmental responsibility, giving students a tangible way to feel like their actions matter.
24. Plant a Spring Garden
What you’ll need:
- Seeds or small starter plants (sunflowers, marigolds, radishes, beans, or herbs are all beginner-friendly)
- A raised bed, garden plot, or containers with drainage holes
- Potting soil or garden soil
- A small trowel or hand shovel
- A watering can
Step-by-step planting guide:
- Choose the right spot: Pick a location that gets at least 4–6 hours of sunlight a day. A yard, balcony, or even a sunny windowsill with containers all work.
- Prep the soil: Loosen the soil with a trowel and, if using containers, mix in fresh potting soil so roots have room to spread.
- Plant the seeds: Follow the depth guidance on the seed packet (usually about twice the seed’s width) and space seeds apart according to the package instructions.
- Water gently: Give the soil a light, even watering right after planting — enough to moisten it without pooling water on top.
- Set a watering routine: Most seedlings need light watering every day or two until established; let kids take charge of this step to build a sense of ownership.
- Track progress: Start a simple garden journal where kids sketch or photograph the pot each week, noting height and any new leaves.
- Thin and support as needed: Once seedlings sprout, thin out overcrowded ones if the packet recommends it, and add small stakes for taller plants like sunflowers as they grow.
Tips for keeping kids engaged:
- Let them pick out the seed packets themselves at the store or online — ownership over the choice increases interest in the outcome.
- Choose fast sprouters like radishes or beans if you want visible results within a week or two, since patience can be limited at younger ages.
- Add a small handmade sign or plant marker with the child’s name and the planting date.
Why it works: Watching a seed turn into a sprout over a couple of weeks is often more exciting for kids than any single day-trip activity, simply because the payoff builds slowly and keeps them coming back to check on it, which reinforces patience and responsibility in a way few other activities can.
25. Spring-Themed Sensory Table
Bring the outdoors in with an indoor sensory bin filled with fake grass, plastic flowers, and small garden tools.
What you’ll need:
- A large plastic bin or table with raised edges
- Artificial grass mats or green shredded paper as a base
- Plastic flowers, garden tools, and small figurines
- Scoops and small buckets
How to set it up:
- Line the bin with the artificial grass or shredded paper base.
- Scatter plastic flowers, bugs, and small garden tools throughout.
- Add scoops and buckets for play in transferring and sorting.
- Let kids explore freely, “planting” flowers in the grass or “digging” with the small tools.
Why it works: On days when outdoor play isn’t possible, an indoor sensory table keeps the seasonal theme and tactile exploration alive without stepping outside at all.
26. Flower Pressing
Press flowers between heavy books for a week, then use them for bookmarks or greeting cards. It’s a slower project that pairs patience with a rewarding payoff.
What you’ll need:
- Fresh flowers (ideally flat ones like pansies, violets, or daisies)
- Parchment paper or blotting paper
- Heavy books
- Clear contact paper, cardstock, or a laminator (for the finished project)
How to do it:
- Place a flower flat between two sheets of parchment or blotting paper.
- Slide it between the pages of a heavy book, then stack more books on top for added weight.
- Leave it undisturbed for about one to two weeks, checking occasionally.
- Once fully dried and flattened, carefully peel the flower away from the paper.
- Use the pressed flower to decorate a bookmark, greeting card, or piece of framed art, sealing it with contact paper or clear tape to protect it.
Why it works: This project spans a week or two, which makes it a good pairing with the earlier nature walk — kids get a follow-up reason to check in on their project on days after the original outing, extending the seasonal fun.
27. Indoor Obstacle Course
Use couch cushions, hula hoops, and painter’s tape to build a mini obstacle course. It’s a great way to burn energy when outdoor play isn’t possible.
What you’ll need:
- Couch cushions and pillows
- Hula hoops or rope for stepping-through stations
- Painter’s tape for marking balance lines on the floor
- Chairs or small furniture for crawling under (with supervision)
How to set it up:
- Lay a strip of painter’s tape on the floor as a balance-beam line.
- Arrange cushions in a row for hopping or crawling over.
- Stand a hula hoop up (leaned against furniture) as a station to step or crawl through.
- Set a chair with enough clearance underneath to serve as a crawling station.
- Time kids as they move through the course, or let them design and rearrange their own layout.
Why it works: An indoor obstacle course channels pent-up energy on rainy days into a structured physical activity, and letting kids help design the layout adds a creative planning element on top of the exercise itself.
28. Spring-Themed Baking with Kids
Baking is an easy way to bring the season indoors, and it works for almost any age with the right level of supervision.
What you’ll need:
- A simple sugar cookie or cupcake base recipe
- Spring-shaped cookie cutters (flowers, chicks, eggs, bunnies)
- Frosting and natural or gel food coloring
- Sprinkles or candy decorations
- Measuring cups and mixing bowls
How to do it:
- Mix and roll out the cookie dough (or prepare cupcake batter) together, letting kids help measure and pour ingredients.
- Use spring-shaped cutters to cut out cookies, or bake cupcakes in a standard tin.
- Once baked and cooled, set up a decorating station with tinted frosting in pastel spring colors.
- Let kids decorate freely with sprinkles, small candies, or piped frosting details.
- For younger toddlers who shouldn’t be near a hot oven, swap in a no-bake option — like rice cereal treats shaped into small “nests” and topped with candy eggs.
Why it works: Beyond the treat itself, baking together builds fine motor skills through mixing, pouring, and decorating, and it gives kids a strong sense of accomplishment they can literally taste at the end.
How to Choose the Right Spring Activity for Your Child’s Age
Not every spring activity works for every age group, so here’s a quick way to match ideas to development stage:
- Toddlers (1–3 years): Prioritize sensory play, simple crafts, and short outdoor bursts. Skip anything with small parts or long attention requirements. Best fits: sensory bins, bubble time, simple flower crafts, muddy nature play.
- Preschoolers (3–5 years): Add scavenger hunts, gardening, and simple science demos, such as the rain cloud jar. Best fits: spring scavenger hunt, planting seeds, flower pressing (with help), storytime.
- Elementary age (6–10 years): Introduce structured crafts, life cycle projects, biking, and writing-based activities that build on classroom learning. Best fits: kite flying, birdhouse building, class garden projects, spring writing prompts.
Matching the activity to the age keeps kids engaged rather than frustrated, and makes cleanup and supervision easier for the adults involved.
Frequently Asked Questions
What are some easy spring activities for kids at home?
Puddle jumping, sidewalk chalk games, flower crafts, and a simple sensory bin are all easy spring activities that need little setup and use items most households already have.
What is a good spring activity for toddlers specifically?
Sensory play works best for toddlers. A flower-petal sensory bin or a rain cloud in a jar are simple, safe options that hold a toddler’s attention without requiring close supervision around small parts.
How can teachers incorporate spring into the classroom?
Life cycle science units, weather graphing, spring writing prompts, and a small class garden are all effective spring classroom activities that tie into common curriculum goals while keeping students engaged during the seasonal energy shift.
What can kids do outside in spring besides playing on a playground?
Bug hunts, nature scavenger hunts, kite flying, bike rides, picnics, and gardening all offer variety beyond a standard playground visit, and most require little to no equipment.
What are good rainy-day alternatives to outdoor spring activities?
Indoor sensory tables, flower pressing, baking spring-shaped treats, and an indoor obstacle course all keep the spring theme alive without needing dry weather.
Final Thoughts
Spring hands parents and teachers a season full of natural opportunities for play, learning, and connection.
Whether it’s a toddler digging in a sensory bin, an elementary student tracking a caterpillar’s transformation, or a family kite-flying outing on a windy afternoon, these spring activities for kids are built to be simple, affordable, and genuinely fun.
Pick two or three ideas from this list to try this week — you don’t need to do all of them at once.
Bookmark this guide and come back to it throughout the season whenever you need a fresh idea for a weekend, a rainy afternoon, or a classroom lesson plan.
2 thoughts on “25+ Fun Spring Activities for Kids (Toddlers to Elementary)”