
Paper plate crafts for kids are one of the easiest ways to turn a boring afternoon into a fun, creative adventure. Paper plates are inexpensive, easy to find, and perfect for little hands.
You do not need fancy tools or a big budget. With a few simple supplies like paint, glue, and colored paper, your child can make a smiling sun, a colorful fish, or a roaring lion mask.
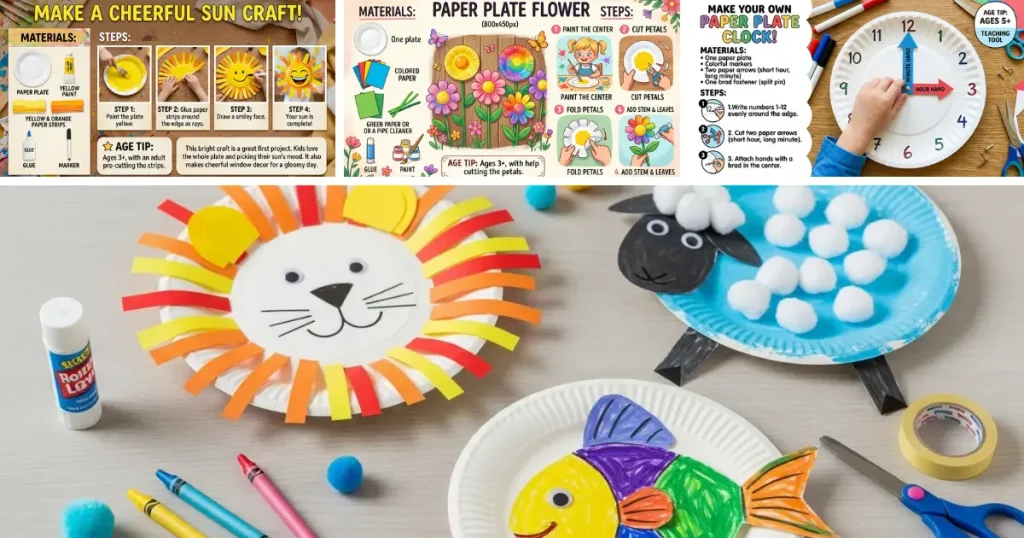
In this article, you will find 15+ fun and easy paper plate crafts, along with safety tips and the benefits of crafting for your child’s growth.
Why Paper Plate Crafts Are Fun to Make Again and Again
A paper plate is a blank canvas in the perfect shape. It can be a sun, a face, a flower, or a clock. Kids don’t need to cut tricky shapes or follow strict rules.
They can fold it, paint it, tear it, or glue things onto it. One plate can become a fish today and a lion tomorrow.
Because every child adds their own colors and ideas, no two crafts look the same. That makes the fun fresh every time. Ready to see what you need to get started?
Simple Supplies You Probably Already Have at Home
You do not need a trip to the craft store. Most paper plate crafts use things already in your kitchen or junk drawer. Start with plain white paper plates, then look for washable markers, crayons, or poster paint. Add child-safe glue, safety scissors, and tape.
Scraps of colored paper, old magazines, cotton balls, yarn, and cupcake liners work great as decorations. Pasta shapes, leaves, and used wrapping paper can join the party too. Keep a “craft box” for these odds and ends.
Soon, your child will start spotting new craft ideas in everyday items. Now, let’s put those supplies to work!
15+ Paper Plate Crafts for Kids
Paper Plate Sun
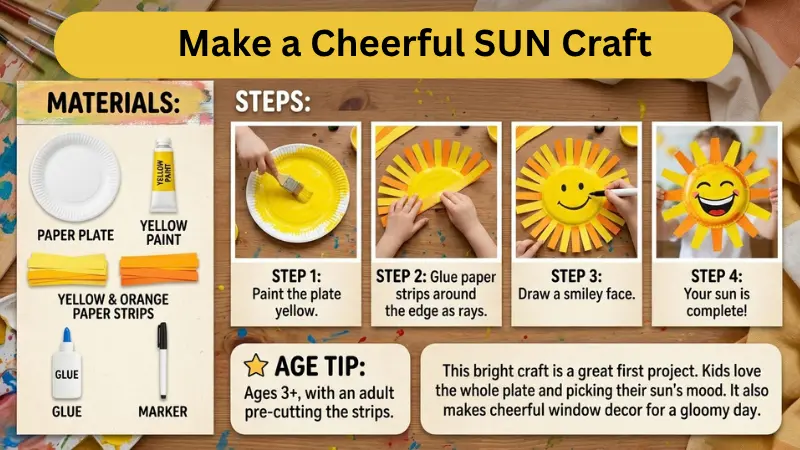
Materials: One plate, yellow paint, yellow and orange paper strips, glue, marker.
Steps: Paint the plate yellow. Cut paper strips and glue them around the edge as rays. Draw a smiley face.
Age tip: Ages 3+, with an adult pre-cutting the strips.
This bright craft is a great first project. Kids love painting the whole plate and picking their sun’s mood. It also makes cheerful window decor for a gloomy day.
Paper Plate Fish
Materials: One plate, paint or crayons, colored paper, googly eye or a drawn eye, glue.
Steps: Cut a small triangle from the plate to make a mouth. Glue it on the opposite side as a tail. Decorate with scales and add an eye.
Age tip: Ages 4+. Adults should cut the triangle.
Kids enjoy turning a round plate into a swimming fish. It is perfect for ocean-themed days or after a trip to the aquarium. Hang several from the ceiling to build your own sea.
Paper Plate Clock
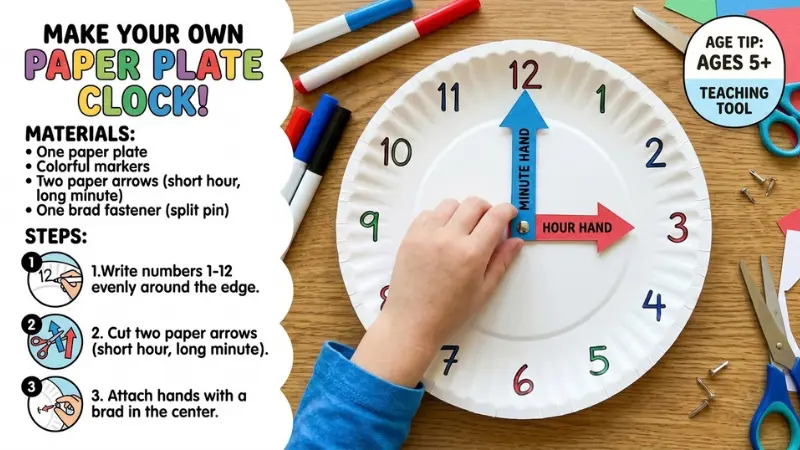
Materials: One plate, marker, two paper arrows, a brad fastener.
Steps: Write the numbers 1 to 12 around the edge. Cut two arrows for the hands. Attach them in the center with a brad.
Age tip: Ages 5+, since it involves numbers.
This craft turns telling time into a hands-on game. Kids can move the hands and show their favorite times, like lunch or bedtime. It makes a handy teaching tool.
Paper Plate Lion Mask
Materials: One plate, yellow and brown paper strips or yarn, crayons, glue, elastic or a craft stick.
Steps: Cut two eye holes. Glue strips around the edge for a mane. Draw a nose and whiskers, then attach a stick or elastic.
Age tip: Ages 4+. Adults should cut the eye holes.
Kids will want to roar as soon as it’s finished. Masks encourage pretend play and storytelling. Try making a whole zoo of animal masks for a family show.
Paper Plate Flower
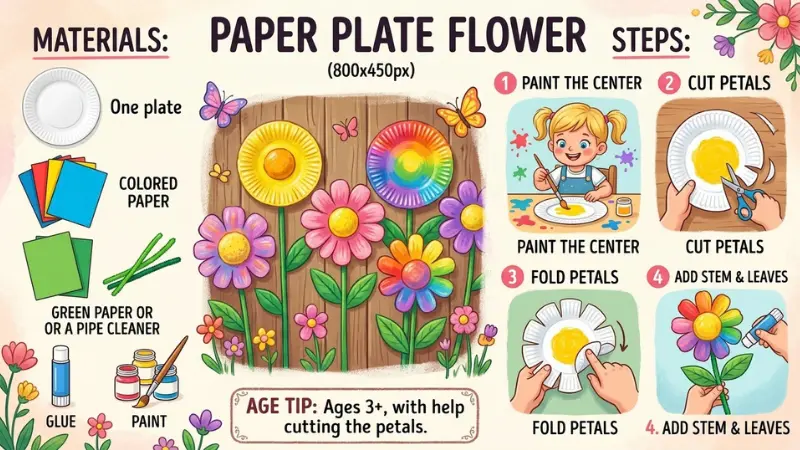
Materials: One plate, colored paper, green paper or a pipe cleaner, glue, paint.
Steps: Paint the center of the plate. Cut the outer rim into petals and fold them slightly. Add a green stem and leaves.
Age tip: Ages 3+, with help cutting the petals.
This lovely spring craft never wilts. Kids can pick any colors they like, even a purple or rainbow flower. Display a “garden” of them on a wall.
Paper Plate Caterpillar
Materials: Three or four plates, paint, glue or a stapler, markers, pipe cleaners.
Steps: Paint each plate a different shade of green. Glue them in a row, overlapping slightly. Add eyes and pipe cleaner antennae to the first plate.
Age tip: Ages 4+. Adults should handle the stapler.
Little ones love how long the caterpillar grows with each plate. It pairs well with a story about a hungry caterpillar. Kids can count the body parts as they go.
Paper Plate Ladybug
Materials: One plate, red paint, black paper circles, black marker, glue.
Steps: Paint the plate red. Fold it in half and glue on black dots. Add a black head and two small antennae.
Age tip: Ages 3+.
Ladybugs are easy to make and fun to decorate. Count the dots together or let your child add as many as they like. It is a sweet craft for a bug-themed week.
Paper Plate Jellyfish
Materials: One plate, paint, long crepe paper or ribbon strips, glue, marker.
Steps: Paint the plate in bright colors. Glue ribbon strips along the bottom edge as tentacles. Draw a happy face on top.
Age tip: Ages 3+.
The wavy tentacles flutter when you hang this jellyfish near a fan or open window. Kids enjoy picking glittery or rainbow ribbons. It is a good craft for ocean lovers.
Paper Plate Owl
Materials: Two plates, brown paint, orange and white paper, glue, scissors.
Steps: Paint the plates brown and glue them together. Add two big white circles for eyes and an orange triangle for the beak. Cut small wings from extra paper.
Age tip: Ages 5+.
This wise little owl looks great on a bedroom door. Kids can mix feathers, paper scraps, or fabric for extra texture. It is a fun fall craft too.
Paper Plate Rainbow
Materials: One plate, colored paper strips or paint, cotton balls, glue.
Steps: Cut the plate in half. Glue colored strips in curved layers on the rim. Add cotton-ball clouds to each end.
Age tip: Ages 3+. Adults should cut the plate.
Rainbows help kids learn colors in order. Let them name each stripe as they glue it on. It is a cheerful project for rainy days or spring.
Paper Plate Turtle
Materials: One plate, green paint, green paper for head and legs, glue, markers.
Steps: Paint the plate green and add shell patterns. Cut a head, four legs, and a tail from green paper. Glue them underneath the edge.
Age tip: Ages 4+.
The turtle is slow and steady, just like a calm craft time. Kids can decorate the shell with their favorite patterns. It is a great match for animal lessons.
Paper Plate Snowman
Materials: Two plates, white paint or paper, orange paper, black paper, glue.
Steps: Glue two plates together, one on top of the other. Add a carrot nose, button eyes made of paper, and a black hat. Draw a scarf with markers.
Age tip: Ages 3+.
This winter craft lets kids build a snowman without the cold. Add cotton balls or glitter for extra sparkle. It makes a cute holiday decoration.
Paper Plate Jack-o’-Lantern
Materials: One plate, orange paint, black paper, glue, green paper.
Steps: Paint the plate orange. Cut triangles and shapes from black paper for the face. Glue a green stem on top.
Age tip: Ages 3+.
This is a safe, mess-free way to enjoy pumpkin season. Kids can design silly, spooky, or happy faces. Hang a few on the door for Halloween.
Paper Plate Butterfly
Materials: Two plate halves, paint, a clothespin, pipe cleaners, glue.
Steps: Cut a plate in half to make two wings. Decorate them with bright colors. Clip them to a clothespin body, then add pipe-cleaner antennae.
Age tip: Ages 4+. Adults should cut the plate.
Colorful wings make each butterfly one of a kind. Kids can flutter them around the room after the paint dries. This easy craft feels magical.
Paper Plate Weaving
Materials: One plate, yarn, scissors, tape, a hole punch.
Steps: Punch an odd number of holes around the edge of the plate. Thread yarn across to make “spokes.” Weave another yarn piece over and under the spokes.
Age tip: Ages 6+.
Weaving takes patience but looks beautiful. It is a calm, quiet activity that builds focus. Try different yarn colors for a rainbow pattern.
Paper Plate Tambourine
Materials: Two plates, dried beans or rice, stapler or tape, markers, ribbons.
Steps: Decorate the plates. Put a handful of beans between them. Seal the edges with tape or staples and add ribbons.
Age tip: Ages 3+. Adults should seal the edges, and children under 3 should skip loose beans.
This craft makes noise, and kids love that. After decorating, have a mini music parade at home. It is a playful way to explore rhythm.
Paper Plate Craft Safety Tips for Toddlers and Young Kids
Keep craft time fun and safe. A few simple habits keep little hands protected while they create.
- Choose non-toxic glue and paints: Look for labels like “washable” and “child-safe.”
- Avoid small parts: Skip buttons, beads, and googly eyes for kids under 3, as they are choking hazards.
- Supervise at all times: Never leave your child alone with craft supplies.
- Use safety scissors: Pre-cut shapes for toddlers and let older kids use blunt-tip scissors.
- Prevent mouthing: Keep materials out of reach when not in use.
- Keep the area clean: Use a mat or old newspaper, and wash hands afterward.
Always check the age labels on your supplies before you begin.
Benefits of Paper Plate Crafts for Child Development
Crafting is more than just fun. Every cut, paint stroke, and paste helps your child grow in small but important ways.
Improves Fine Motor Skills
Gripping crayons, tearing paper, and pasting pieces strengthen the small muscles in their hands. These skills help kids later with writing, buttoning clothes, and tying shoes.
Boosts Creativity and Imagination
Choosing colors and designing characters lets children make their own decisions. There is no wrong answer, so they feel free to try new ideas.
Builds Focus and Patience
Finishing a project step by step teaches kids to stay with a task. They learn that good things take time, and they feel proud when they are done.
Supports Language and Learning
Crafting is a natural time to name colors, shapes, and animals. Talking about what they make builds vocabulary and helps kids explain their ideas.
Strengthens Parent-Child Bonding
Sitting together with glue and paint creates a calm, happy time with no screens. Kids remember these small moments, and parents enjoy them too.
Conclusion
Paper plate crafts prove that big fun can come from a simple stack of plates. From a sunny face to a flapping butterfly, each project lets kids create, learn, and smile.
Gather your supplies, pick a favorite from the list, and sit down together. You might find the best part isn’t the finished craft, but the time you spent making it. Which one will you try first?
I can also put this in a file (Word, HTML, or Markdown) if you’d like. I can also draft this as a ready-to-send email.
FAQ
What age is best for paper plate crafts?
Children as young as 2 or 3 can enjoy simple painting and gluing with adult help. Kids aged 4 to 8 can handle cutting, folding, and more detailed designs.
What kind of paper plates work best for crafts?
Plain white, uncoated paper plates are best. They absorb paint and glue well and cut easily.
What kind of glue should I use on paper plates?
White school glue or glue sticks work well. For heavier decorations like pasta or beans, use a thicker craft glue and let it dry fully.
Can toddlers do paper plate crafts safely?
Yes, with close supervision. Use washable paint, skip small parts, and have an adult handle scissors and staplers.
How do I make paper plate crafts last longer?
Let the paint dry fully, then add a light coat of clear, child-safe sealer if you want it to last. Store the crafts flat in a dry place.
Are paper plate crafts good for classrooms and parties?
Yes. Paper plates are cheap, easy to find, and simple to prep for groups. They work well for birthday parties, rainy-day activities, and themed lessons.