
How to make apple baby food? It’s a question many new parents find themselves asking as they embark on their baby’s solid food journey.
Creating nutritious and delicious meals for your little one doesn’t have to be complicated or time-consuming.
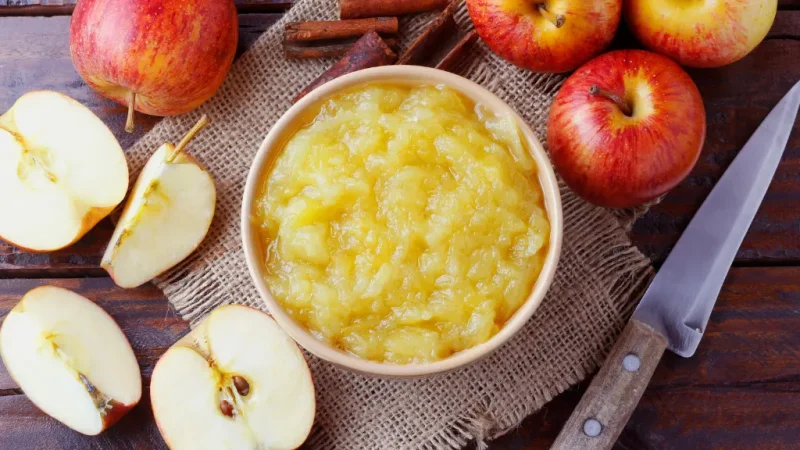
Wash and peel apples, cook until soft, then puree to the right consistency for your baby. It’s that easy!
In this article, we’ll dive deep into the process of making apple baby food at home. From choosing the right apples to storing your homemade puree, we’ve got you covered with step-by-step instructions, helpful tips, and creative serving ideas. Let’s get started on this tasty adventure!
Why Homemade Apple Baby Food is a Game-Changer
Before we roll up our sleeves and get cooking, let’s talk about why making your own apple baby food is such a fantastic idea.
The Sweet Benefits of DIY Apple Puree
- Fresh and Flavorful: Nothing beats the taste of homemade food, even for tiny taste buds.
- Budget-Friendly: Save those pennies for diapers (you’ll need them).
- Nutrient-Rich: You control what goes in, ensuring maximum nutrition.
- Customizable: Adjust texture and flavors as your baby grows.
- No Additives: Skip the preservatives and added sugars found in some store-bought options.
Now that we’re all excited about making our own apple baby food, let’s gather our ingredients and tools!
What You’ll Need: The Apple Baby Food Toolkit
Ingredients:
- 4-5 medium-sized apples (Choose organic if possible)
- Water (for cooking)
Equipment:
- A sharp knife (for us grown-ups, not the baby!)
- A peeler
- A pot for cooking
- A blender or food processor
- Ice cube trays or small containers for storage
Got everything? Great! Let’s move on to the fun part – actually making the apple baby food!
Step-by-Step Guide: From Apple to Awesome Baby Food
Step 1: Prep Those Apples
First things first, give those apples a good wash. Even if they’re organic, you want to make sure they’re squeaky clean.
Then, grab your peeler and get to work. Peel those apples like you’re unwrapping a gift – because that’s what nutritious food is for your baby, a gift!
Once peeled, core the apples and chop them into small chunks. The smaller the chunks, the faster they’ll cook. Think bite-sized pieces that would fit nicely in your baby’s tiny mouth (if they had teeth, that is).
Step 2: Cook ‘Em Up
Now, toss those apple chunks into your pot and add just enough water to cover them. We’re not making apple soup here, so don’t go overboard with the water.
Bring the water to a boil, then reduce the heat and let it simmer. Cover the pot and let the apples cook until they’re tender.
This usually takes about 10-15 minutes, but keep an eye on them. You’ll know they’re done when you can easily pierce them with a fork.
Step 3: Blend, Baby, Blend!
Once your apples are cooked and tender, it’s time to transform them into smooth, creamy baby food. Drain the apples, but don’t throw away all the cooking water just yet!
Transfer the cooked apples to your blender or food processor. Start blending, adding small amounts of the reserved cooking water as needed to achieve the desired consistency.
Remember, every baby is different, so you might need to experiment a bit to find the texture your little one prefers.
Step 4: Cool It Down
Your apple puree is almost ready, but hold your horses! We need to let it cool down before serving or storing. Nobody likes a burnt tongue, especially not a baby.
Let the puree cool to room temperature. While you’re waiting, you can do a little victory dance – you’ve just made homemade baby food!
Storing Your Homemade Apple Baby Food
Now that you’ve made this delicious apple puree, you probably want to know how to store it properly.
After all, your baby isn’t going to eat it all in one sitting (although they might want to – it’s that good!).
Refrigerator Storage
If you plan to use the apple puree within a few days, you can store it in an airtight container in the refrigerator. It should keep well for about 3-4 days.
Freezer Storage
For longer storage, freezing is your best bet. Here’s a cool trick: pour the puree into ice cube trays.
Each cube is about 1 ounce, which is a perfect serving size for a baby. Once frozen, pop the cubes out and store them in a freezer bag.
Frozen apple puree can last up to 3 months. Just remember to label the bag with the date you made it. Trust me, in the haze of new parenthood, you’ll thank yourself for this little reminder.
Serving Suggestions: Making Mealtime Fun and Nutritious
Now that you’ve got your homemade apple baby food ready to go, let’s talk about how to serve it to your little one.
For Beginners (4-6 months)
When you’re just starting out with solid foods, keep it simple. Serve the apple puree on its own, slightly warmed or at room temperature. Always test the temperature before feeding your baby – you don’t want any surprises!
For Growing Eaters (6-8 months)
As your baby gets more comfortable with solids, you can start mixing things up a bit. Try combining the apple puree with:
- Oatmeal or rice cereal for a hearty breakfast
- Plain yogurt for a creamy, probiotic-rich snack
- Mashed banana for a fruity twist
For Adventurous Babies (8+ months)
Once your baby is a pro at eating solids, you can get even more creative:
- Mix apple puree with cooked and pureed sweet potato for a vitamin-packed meal
- Blend it with cooked and pureed chicken for a savory-sweet combo
- Use it as a natural sweetener in other vegetable purees
Remember, always introduce new foods one at a time and wait a few days before introducing another new food. This helps you identify any potential allergies or sensitivities.
Spicing Things Up: Safe Flavor Additions for Apple Baby Food
As your baby grows and becomes more adventurous with food, you might want to introduce some new flavors to their apple puree. Here are some safe and tasty additions:
Spices
- Cinnamon: A classic pairing with apple, and it may help regulate blood sugar.
- Nutmeg: Just a tiny pinch can add warmth and depth to the flavor.
- Ginger: Known for its digestive benefits, a small amount can add a nice zing.
Other Fruits
- Pear: Creates a sweeter, more complex flavor profile.
- Berries: Strawberries or blueberries can add antioxidants and a beautiful color.
- Peach: Offers a complementary sweetness and extra vitamins.
Remember, when introducing new flavors, start with a very small amount and gradually increase based on your baby’s reaction.
Troubleshooting: Common Apple Baby Food Dilemmas
Even with the best intentions, sometimes things don’t go exactly as planned. Here are some common issues you might encounter and how to solve them:
Problem: The puree is too thick
Solution: Add a bit more water or breast milk/formula to thin it out.
Problem: The puree is too thin
Solution: Cook it down a bit more to evaporate excess liquid, or add some baby cereal to thicken it up.
Problem: The puree has turned brown
Solution: This is normal oxidation and doesn’t affect the taste or nutritional value. To prevent it, you can add a few drops of lemon juice to the puree.
Problem: Your baby doesn’t seem to like it
Solution: Don’t worry! It can take up to 15-20 exposures for a baby to accept a new food. Keep offering it, and try mixing it with foods your baby already enjoys.
The nutritional powerhouse: Why apples are great for babies
Now that you’re an expert in making apple baby food, let’s take a moment to appreciate why apples are such a fantastic first food for babies.
Nutritional Benefits of Apples for Babies
| Nutrient | Benefit |
|---|---|
| Fiber | Helps prevent constipation and promotes digestive health |
| Vitamin C | Boosts immune system and aids in iron absorption |
| Antioxidants | Protects cells from damage and supports overall health |
| Natural Sugars | Provides energy and introduces sweet flavors |
Apples are like nature’s little multivitamins, packed with goodness that helps your baby grow strong and healthy. Plus, their mild flavor and smooth texture make them an ideal first food for most babies.
Wrapping Up: You’re Now an Apple Baby Food Pro!
Congratulations! You’ve just unlocked the secret to making delicious, nutritious apple baby food at home.
From prepping and cooking to storing and serving, you’re now equipped with all the knowledge you need to provide your little one with the best start to their culinary journey.
Remember, making baby food isn’t just about nutrition – it’s an act of love. Each spoonful of that homemade apple puree is packed with care and affection.
And who knows? This might be the start of your baby’s lifelong love affair with healthy, homemade food.
So, what are you waiting for? Grab those apples and get cooking! Your baby’s taste buds are in for a treat, and you get to be the chef behind their first gourmet experience. Happy cooking, and even happier feeding!
Frequently Asked Questions about Homemade Apple Baby Food
Still have some burning questions? Don’t worry, I’ve got you covered! Here are some common questions parents ask about making apple baby food:
When can I start giving my baby apple puree?
Most pediatricians recommend starting solid foods, including apple puree, around 6 months of age. However, every baby is different, so it’s best to consult with your pediatrician.
Can I use any type of apple?
Yes, you can use any variety of apple. However, sweeter apples like Gala, Fuji, or Red Delicious tend to make tastier purees.
Do I need to add sugar to the apple puree?
Absolutely not! Apples are naturally sweet, and babies don’t need added sugar in their diet.
Can I mix apple puree with formula or breast milk?
A: Yes, you can mix apple puree with formula or breast milk to create a familiar taste and adjust the consistency.
How do I know if my baby is allergic to apples?
While apple allergies are rare, watch for signs like rash, vomiting, or difficulty breathing after eating apples. If you notice any of these symptoms, stop feeding apples and consult your pediatrician immediately.
1 thought on “how to make apple baby food? Make Delicious and Nutritious”